Lab #1: Git and GitHub
Monday, 12 September 2016
Today we're going to learn how to fork, clone, and push changes to a repository on GitHub using git. We do this in preparation for creating personal websites that will be hosted by GitHub pages.
Everything we do today will be in a throw-away workspace, so feel free to experiment after completing the
instructions here.
Q&A
- Why I don't use Sakai
- What's my grade?
Fork
The first thing that we are going to do today is fork some code that will allow us to have something to work with in Cloud9 later. We'll use this as an opportunity to get wome web code and see what that looks like.
You are not committing to anything today: this is just for practice. We'll start by going to this repo:
https://github.com/henrythemes/jekyll-starter-theme
This is the repo for a very, very simple Jekyll web theme. We will us this as a starter theme to practice with.
Once you are at the above repo, click the Fork button and select your username when prompted to make a copy of the repo in your account.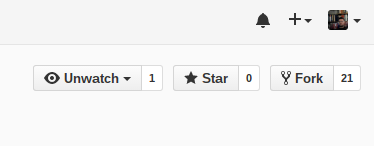
If you get a window asking where you want to fork the repo to, select your github username. After a few seconds you will be taken to the repo page for the copy that you have made in your Github account.
Clone
Once there, click the big green Clone or Download button, make sure you're using HTTPS (the default), and copy the resulting link. 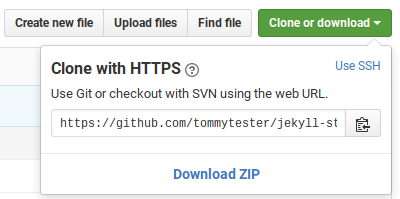 It will look like the link in the image on the right.
Then, switch over to Cloud9, make sure you're logged in, and go to a terminal.
Make sure you're in your "workspace" directory with pwd. If not, type cd ~/workspace. Then type the following command, and paste your link in after, so that it looks like this: 
Successful cloning
git clone https://github.com/YOUR-GITHUB-USERNAME-GOES-HERE/jekyll-starter-theme.gitThis makes a copy of the repository that you just forked to your local workspace in Cloud9. This is called cloning.
Then descend into the directory:
cd jekyll-starter-themeAnd explore what is in there:
ls -lahAdd & Commit
You should see a _config.yml file somewhere in the directory.
This file is filled with variables that Jekyll reads to structure the information made by your webpage.
The basic structure of variables for Jekyll is:
variable-name: "variable value"
I want you to change the title variable to your name or whatever you like.
Change the subtitle as well. You can open _config.yml by double-clicking it or by
typing c9 _config.yml
From this:
If you use an apostrophe, surround them in "" so you don't confuse Jekyll.
# site.title

title:    'Jekyll Starter Theme'
subtitle: 'Another Minimalistic Static Site Quick Starter Theme'
To something like this:
# site.title

title:    'YOUR-NAME-HERE'
subtitle: 'Some subtitle I just made up!'
Then I want you to change the url variable so that this will show up at the address associated with your GitHub repo.
So change this:
url: 'http://henrythemes.github.io/jekyll-starter-theme'
To this:
url: 'http://YOUR-GITHUB-USERNAME.github.io/jekyll-starter-theme'
Once you have made those changes, then Save the file and we will push it back up to GitHub.
Note: The dot in the tab tells you you haven't saved the file yet. Ctrl-s or File > Save will do this for you. Git can't see your changes until you save.

Push
Confirm that you've saved with our friend git status. You should see that _config.yml has been modified.
So in order to record these changes and get them into our remote repo on GitHub, we have to first go through the normal commit process.
First, add the files: The -v flag stands for verbose and makes git tell you explictly what it's doing. Im
git add -v _config.ymlThen commit the changes (remember to leave a message for yourself):
git commit -a -m "updated config with new title and URL"Then we have to push the changes upstream:
git pushAnd that should be that.
GitHub Pages
You should be able to see this web code rendered as a webpage now. Try going to the address that corresponds to the GH pages site associated with this repository. It will look like this:
https://YOUR-GITHUB-USERNAME.github.io/jekyll-starter-theme/
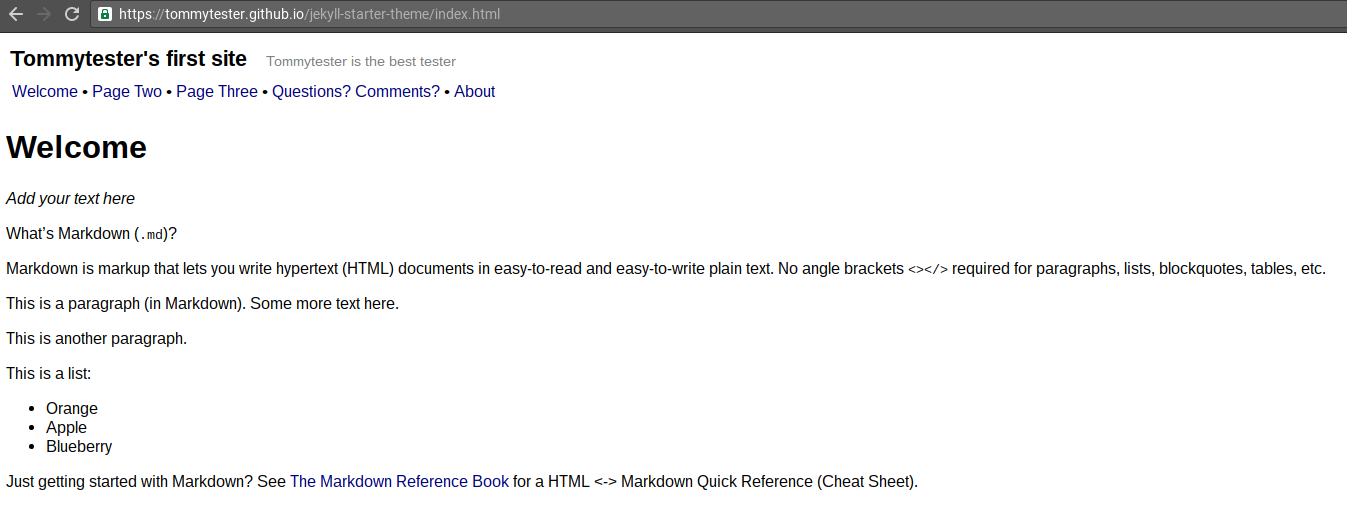
And there you should see a site with the title and subtitle that you assigned in the _config.yml file.
Here's Tommytester's site:
Advanced
If you're done and would like to try out something new, follow the instructions here to run a copy of your site on cloud9. This is what we'll all be doing eventually, so you're getting ahead. It's way faster to be able to make a change in Cloud9 and view it immediately rather than pushing to Github all the time.
Once your site is up, try changing some of the html pages, saving, then refreshing the Cloud9 preview. You should see your changes. Practice your HTML, Markdown, or CSS!
For next time
Please play around with your new Jekyll site to practice your new skills. Try modifying one.md, two.md, or three.html. Try creating a new .md or .html file. Add, commit, and push your changes then refresh to see what they look like. If you know some CSS, try modifying css/style.css to change the look or colors of your page. We'll create a new workspace for future projects, so no worries if you break things. If you want, create an entirely new workspace and repeat everything from Clone onwards. You may need to push -f to overwrite your previous commits to your fork. Don't worry if you get stuck- you can always delete your fork off of Github entirely, create a new workspace, and start from the beginning. It's all good practice!
I would like you to have a look at some tutorials and guides to Markdown for next time. Markdown is a lightwieght way of writing HTML that doesn't require a bunch of angle brackets. Both Jekyll and pandoc, which we'll learn later, use Markdown to generate content for us and it's widely used accross the Web (including on Github in the comments, etc.).
Kirk Strobeck's page describes the origin and intent of Markdown, and provides links to useful resources. Reading: “What is Markdown?” Ken Strobeck. http://whatismarkdown.com/.
Dan Harper gives a good introduction to how Markdown is used and what it looks like in the wild. Reading: “Markdown: the Ins and Outs” Dan Harper. http://code.tutsplus.com/tutorials/markdown-the-ins-and-outs--net-25482.